Transactions Not Showing Up In Quicken 2016 For Mac
Here is the response: Thank you for your message about the support offered for Quicken 2016 for Mac. Windows back up file quickbooks for mac. We understand the importance of being able to easily manage your accounts and apologize for any inconvenience this has caused. Our IT groups have informed us, currently, we do not support this version. Best dv video capture software for mac. They have not provided any additional information about possible future support. However, other members have had success using Direct Connect.
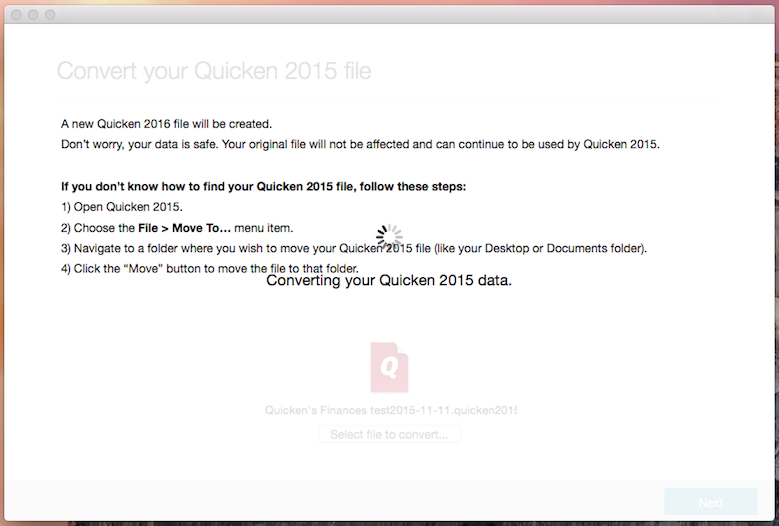
New accounts for Quicken for Mac 2015 and 2016 Select the File menu in Quicken, then New. Choose a name for the file and enter it in the Save As field, then click Save. My quicken program cannot show transactions for the past 2-3 months. It has been working well till last week, but now it does not. I now have a blue square showing up on transactions and the message reads: Mark as reviewed, Un-match this transaction, Mark all as reviewed. I opened quicken for mac lion today (v 16.1.1) and, lo.
Please try using your nine digit USAA number and four digit online PIN for the requested User ID and Password. Don't want Direct Connect. I want to seamlessly download transactions into financial software that USAA supports. They must support something.

When importing data from Quicken, reconciliations are not imported through the QIF file exported by Quicken. To quickly mark your historical transactions as reconciled, we recommend creating a “catch-all” statement using the following steps: • Select the account you would like to reconcile and choose Account > Reconcile with Bank Statement. • In the statement view, click the plus button near the upper right corner of the window to create a new statement.
• In the “Make New Statement” sheet, set the open and close balance to 0.00, set the dates to cover the range of transactions you want to remove, and set the “Automatically reconcile” pop-up to “All Transactions.” • Click “OK” to create the new statement and automatically reconcile all transactions between the dates you entered. • Click on the lock icon to lock the statement.
The statement does not need to be balanced, since it is only being used as a placeholder, although you can adjust the close balance if you prefer to see a green checkmark on the statement. • Switch back to the register view by clicking the button with four horizontal lines above the transactions in this account. At this point you should see the transactions in your account register marked as reconciled. Reconciling is covered in detail starting on page 86 in the Banktivity 5 Manual: We also have a great tutorial video, “Next Steps: Reconciling Accounts in iBank,” that applies to both iBank 4 and Banktivity 5. It’s on our YouTube channel here: This entry was posted in and tagged,,,,,,. Bookmark the. 26 people found this article useful This article was helpful This article was helpful 26 people found this article useful.