How To Add Document Properties In Excel For Mac
Normally, the default author name of a created Word document is the user name of Windows you’ve currently logged in. Sometimes you may need to change the author of a Word document to another one. Now this page will show. • • Option 1: Change author name in Word 2016 through Properties dialog Step 1: Open your Word document. Step 2: Click the File tab to go to the backstage view. Select the Info tab on the left-side pane. Then on the right side, click on Properties and click Advanced Properties.
Step 3: After the Properties dialog opens, select the Summary tab. Then in the Author box delete the original author name and type a new author name, and click OK to save the changes. Option 2: Change author name in Word 2016 through Word Options dialog Step 1: Open your Word document. Step 2: Click the File tab to go to the backstage view.
Then you will view the View Document Properties item, you can get it from figure 1 easily. Figure 1: View Document Properties in File Menu. Click this item, you will view the Workbook Properties dialog box. In the dialog box, you will view the workbook properties. Click the Summary tab; Then you will view the document properties of current workbook. Go to File Info in Excel 2013 (Prepare Properties in Excel 2007) and all the properties are there including a document panel, advanced and custom properties, same as in Word. In Excel, the only way to add document properties into a worksheet is via a custom function.
Step 3: Click the Options. Step 4: After the Word Options dialog opens, select the General tab. Locate the “Personalize your copy of Microsoft Office” section, change the user name to the name you want, and click OK. Then the author name of your created Word documents in Office 2016 should be the new name.
Familiar way to find out the Document Properties if you have Classic Menu for Office Classic Menu for Office will bring back the familiar user interface of Excel 2003/XP(2002)/2000 into Microsoft Excel 2007/2010/2013. You can easily find out the Document Properties in Excel 2007, 2010, 2013, 2016 and 2019 following your use habit adopted in Excel 2003. There are two methods to find out the Document Properties if you have Classic Menu for Office: The Document Properties in File menu if you have • Click the Menus tab; • Click the File drop down menu; • Then you will view the View Document Properties item, you can get it from figure 1 easily.
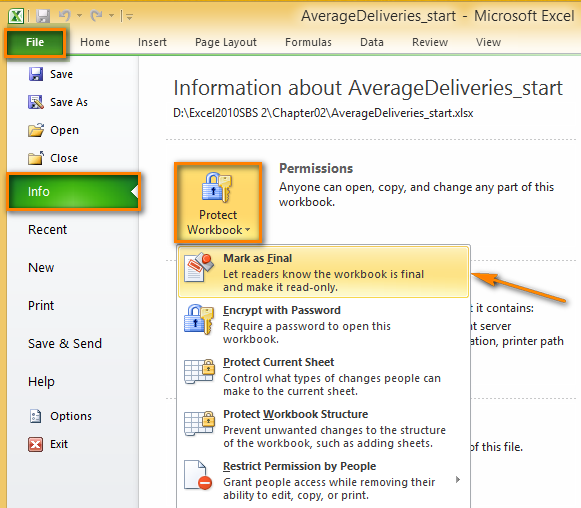
Figure 1: View Document Properties in File Menu • Click this item, you will view the Workbook Properties dialog box. Iphone video enhancer. In the dialog box, you will view the workbook properties. • Click the Summary tab; • Then you will view the document properties of current workbook. Figure 2: Document Properties dialog box The Document Properties in View menu if you have • Click the Menus tab; • Click the View drop down menu; • Then you will view the Properties item at the bottom of View drop down menu list. Figure 3: Properties in Edit Menu Click the Properties item, the Document Properties panel will be added between Ribbon and workspace. In the Document Properties panel, you can easily view and edit workbook Author, Title, subject, keywords, status, commands, and more. The figure 4 may help you more: Figure 4: Document Properties Panel Find out the Document Properties in Ribbon if you do not have Classic Menu for Office View Document Properties in Excel 2010/2013/2016/2019 Ribbon if you do not have • Click the File tab and get into backstage view; • Click the Info button at left bar; • Then you will view the document properties at the right panel.